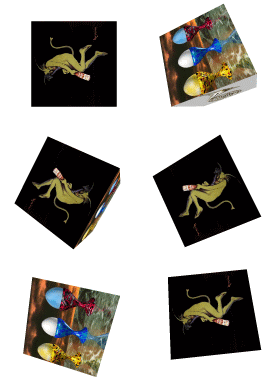
Applying Images to Animated 3D Objects
The Alchemy Mindworks 3D Effects #1 plugin can create rotating three-dimensional objects with your choice of still graphics affixed to their faces. Adding pictures to these objects is easy, and if you understand what’s going on behind the curtain, your pictures can look sharp and sophisticated.

The surfaces of three-dimensional objects are covered with an ethereal substance properly referred to as a “material.” Materials can be all sorts of things – in very high-end 3D rendering software, materials can include things like hair, rocks, rusted metal and so on. The 3D Effects #1 plugins don’t run to materials of quite this degree of complexity, but they do offer the option of replacing their default solid materials with graphics.
In this example, we’re going to apply graphics to the 3D Cube plugin, but the same approach will work for all the 3D Effects #1 plugins that accept graphics. Note that this excludes the 3D Torus and 3D Text plugins – they only support solid-color materials.
By default, you’ll find a column of blue tiles in the center of the 3D Cube plugin window labeled Face Overrides. There’s one tile for each of the six faces of the cube. Double-click on the top one to open its Material Override dialog.
For reasons that probably only make sense to 3D graphic artists, when a picture is applied to a 3D object, it’s called a “texture.” Enable the Selected Material Texture option and click on the Select button to the right of this control. An Open dialog will appear to allow you to select the graphic you’d like to apply to the first face of your cube animation. While you can select any graphic in any format supported by the animation software into which you’ve installed the 3D Effects #1 plugin, you’ll probably want to read the rest of this posting before you do anything serious with this feature.
Grab any suitable graphic for the moment – preferably one with a more or less square aspect ratio.
In building an animated 3D object with pictures applied to its faces, you can choose a different picture for each face, or you can replicate one picture over all the faces of the object. To replicate the picture you’ve just selected over all the faces of the cube, click on Replicate for Other Faces in the Material Override dialog.
Here’s where the discussion of adding pictures to 3D objects is going to get a bit more involved. The rendering engine that creates three-dimensional graphics in the 3D Effects #1 plugins, OpenGL, has some peculiar ideas about the sorts of graphics it wants to use. Specifically, they must have dimensions which are integral powers of two. In the event that you slept through high school mathematics, this means that their dimensions in pixels must be 2, 4, 8, 16, 32, 64, 128, 256, 512, 1024, 2048, 4096 and so on.
It’s unlikely that you’ll have a lot of graphics hanging around with precisely these dimensions, and as such, the Material Overrides dialogs of the 3D Effects plugins will massage the graphics you import into them to make them suitable for use with OpenGL. They can do this in one of two ways, as set by the Texture Size Adjustment group of controls.
- Crop: A square area will be excised from your graphic which has dimensions of the nearest integral power of two.
- Resize: Your entire graphic will be resized to have suitable integral power of two dimensions. If your original graphic wasn’t square, it will be when the resizing function is done with it, and it might look like it’s been stepped on by an inattentive elephant.
You’ll need to select the appropriate Texture Size Adjustment option before you import a graphic into the Material Overrides dialog.
Keep in mind that all the surfaces of the objects created by the 3D Effects plugins are effectively square, even if you only see part of the square in some of the objects. You can achieve the best possible results in applying graphics to three-dimensional objects if you crop your source images to have equal horizontal and vertical dimensions before you get anywhere near them with a Material Overrides dialog, and then select the Resize option in the Texture Size Adjustment group.
If you really want to optimize your pictures for this feature, crop them and then resize them to integral power of two dimensions using one of the optimized resizing filters in Graphic Workshop Professional – the Linear filter is usually the best choice. This will allow them to be applied to OpenGL objects with no further manipulation.
Animated Pictures:
The 3d effect looks cool… I’ll try to make my own.
October 31, 2009, 9:31 am